Followers

Showing posts with label ProMarkers. Show all posts

Saturday, October 27, 2012

The Red Velveteen Rabbit

Hello fellow crafters
I trust you are having a pleasant evening whatever you are doing?

I just wanted to share a little something with you that I have been working on this evening, while watching an old Doctor Who episode with my son, Lewis.  I really miss David Tennant, although I do like Matt Smith as well.  We were watching the episode where the Doctor and Martha go back in time to visit William Shakespeare at the Globe Theatre, called 'The Shakespeare Code' and my son showed me where he sat when he recently visited the theatre in London, with his school.  Bless him, he's really excited.

Anyway, I think I might have been a little bit inspired whilst watching as I came up with this dark and ever so slightly, eerie card. Maybe it also has something to do with Halloween coming up too. Who knows??? Anyway, I really quite like it.

The digital image is from the Saturated Canary, she's called Honey and she can be found here.

The background papers are from DCWV The Madly in Love (12x12cm paper) Stack but the red paper is just a piece of scrap that I cut to size and ran through the BigShot with my Cuttlebug embossing 'Spots' folder.

I then added some ribbon that I cut into strips and stuck behind the main image and added a Craftwork Cards sentiment to finish it off.

I hope you like my card and thank you for taking the time to visit.

Thanks for stopping by
Hugs, Fae xxx

Friday, October 26, 2012

Starla

Hi there, once more I return this evening (this is the last time, I promise...) I have made one more card that I would like to share with you.


This is not being entered into any blog competitions or blog hops etc. its just something I have made this evening for a friends birthday while I was watching TV.  I plucked two 'ideas' from my Inspiration Jar and they said
  1. Use two colours from a paper pad that you haven't used before (even if it looks like they wouldn't go together); and
  2. Use a digital stamp that you have purchased in the last month.  I recently purchased this stamp 'Starla' from the Saturated Canary.
I hope you like my card and thank you for taking the time to visit my blog today. Your visits are much appreciated.  If you like or dislike my card, please feel free to leave a comment, all comments are gratefully received.

Good night, for now... until tomorrow, when I will return with more inspiration for you (I hope).
Hugs x

Monday, January 23, 2012

Naughty... but Nice!

Well... a lot has happened since we last spoke.

I am on DAY 13 off not smoking and, since last Tuesday, I have lost 8lbs on the Slimming World diet, despite my eating like a horse! I'm loving it and feeling great.

A lot of people think I am slightly on the mad side dieting AND quitting smoking at the same time, but you know what... having given up smoking previously (in 2000 and putting on weight) I decided not to just quit this time but combine the two, and this time round... fingers crossed, it seems to be working so far. Big pat on the back for moi!

Anyway, back to my card. I was asked by a work colleague to make a Golden Wedding Anniversary card and I decided to make a 'straight' one and a 'humourous' one. The humourous one, which is in this post, I have decided to enter into the latest Passion 4 Promarkers blog challenge.

I used my promarker pens and my Derwent Watercolour pencils and a little Sansodor to blend. I then added some colour coordinated flowers, leaves, pins and ribbon.

Hope you like my card and thank you for stopping by. Watch out for my next post where you will find the 'straight' Golden Wedding Anniversary card. Enjoy x

Note added: January 24th. I got TOP 5 PASSIONISTA on the Passion 4 Promarkers Blog Challenge for entering this card. Yay


Saturday, January 14, 2012

Clean and Simple Pussy Cat

Hi Girls and fellas
What a fabulously sunny (but chilly) day we have here in Hertfordshire, England.  Hope the weather is being as nice to you wherever you may be in the world?

I have another card to share with you all today. You may remember me saying that I challenged myself to make some more 'male' cards... well that's exactly what I have been doing since our last little chat. They're still a little on the young side for my liking, but I think you could still get away with giving them to older men.


Anyway, here is my first card (and a close up of the colouring technique I used with my Promarkers and my colouring pencils).

I really love Penny Black stamps and have to confess that I have been so blinkered by my digi stamps that I'd almost forgotten how much fun it could be inking up a stamp and stamping out an image on crisp, smooth, white card and colouring it in.  Makes such a difference to not have to switch on the printer and then select and size a digi stamp and sometimes print it a couple of times before I get it to just the right size. I still like both ways though so I'm not complaining.

Anyway, a really simple, 'male' card. Loving the colours and the background paper on this one. Was really pleased with how this one turned out even though there aren't any 'pretty' embellishments etc. Just a plain and simple card that hopefully any man would be happy to receive.

Thanks for taking the time to visit me today.
Hugs,

Friday, January 13, 2012

Kitchen Knight

Hello again, it's me... I'm back

Here's another card made with a digi image from Mo Manning. It's called Kitchen Knight and you can find him here. 

I decided to colour him in in blues and reds and I just love that sleepy ol' dragon.

I mounted the image onto two colours of blue and added some thin ribbons down the left and along the bottom of the image. I then ran a strip of the same blue card through the BigShot with a Cuttlebug embossing folder to achieve the raised 'dots' effect and stuck that to one side of the 8x8 card blank.

Next I coloured the image using my ProMarker pens and my Derwent Watercolour pencils and some Sandodor to blend it all together.  I love the way the colinder 'helmet' and the saucepan 'shield' came out. It really looks good in the flesh!

I wish I could get the photographs to be a true depiction of the colours I have used as these look a little muted by comparison.

Anyway, it makes a nice change to make a card for a child.  I think I might have to make a male card next. I haven't done one of those for a while and I hate doing them unless I am specifically asked to make one, so I think my January CHALLENGE to myself would be to make a male birthday card.

In fact, during most of my blogs visits lately, I have noticed that almost ALL of the cards have been girlie and rarely anything for male birthdays.  I think others should be making a few male cards aswell.

I hope that you like my card and thanks once more, for stopping by.

Hugs xx

Saturday, November 26, 2011

Lili's Flowers

Hi guys and girls
Here's another really simple and quick card I made for Elaine's birthday. Just some really simple background paper, a Lili of the Valley image, that I coloured with my beloved Promarker pens and I mounted that onto red card and then I added some paper roses. Et voila!

Hope you like it?
Thanks for stopping by.

Tuesday, July 05, 2011

Pick-You-Up

I work at a Catholic Secondary School and I thought this lovely little digi stamp from Tiddly Inks with her checked shirt was right up my school's street in terms of School Uniform. So I coloured the skirt in our school colours and added a little message.

My daughter wanted to make the card for a pupil at my school, who also happens to be a colleagues daughter, as she is having a tough time in Year 7, and she wanted to cheer her up. So she asked me to use the image I had coloured on a card for her to make her smile. Bless.

So anyway, here is the finished card.

Hope she likes it and thanks for stopping by. Hugs xxx

Forever Young

Hi ladies
Just a quickie as it's late and I have been editing cards all night and now I am seeing DOUBLE.

Anyway, here's a little card I knocked up in the week using a Forever Friends stamp for a very special lady, who is celebrating her 85th birthday this week. A colleague, Linda, at work asked me to make it; only specifications were to have her name, age and flowers on the front. Well... I figured it had to be special, as it was such a significant birthday (well as far as I am concerned it's a specific age), so here is what I created for her.

I had to make a box envelope for her too as these flowers are pretty BIG and stand some way off the front of the card. I also decorated the inside of the card, but neglected to photograph it before I took it into work to give it to Linda.

I cut out the letters and the numbers by hand, after printing them off onto paper and tracing them. I added some brown DP with pink glittered leaves and then cut out my stamped image using my circle cutter. I then added the flowers, the ribbon etc and then finally the numbers and letters over the top with foam pads.

Linda really liked it and apparently, so did Nancy.
Happy Birthday special lady. Congratulations!

Thanks for stopping by. Hugs xxx

Monday, June 13, 2011

Forever Friends 'Spots & Dots' Challenge

Hi guys and girls
Sorry it's been a while, but here is my card for this fortnight's Forever Friends Challenge (Spots and Dots sponsored by I am Roses). Remember, you don't have to use a Forever Friends image, check out the FF Challenge Blog for the new rules.

Here's my card:
I used Promarkers to colour it in and used a rubber stamp image for the calender embellishment (from Lili of the Valley) at the top left. Coloured the background with my usual 'spotty background' and added some Candi from Craftwork Cards. The border punch was created using my Martha Stewart punch and the background papers are from First Edition Paper (Sweet Owl Collection).

Thanks for stopping by.
Hugs xx

Sunday, May 29, 2011

PB Easel Spinner Card

Hello fellow crafters

Just a quickie that I thought I would like to share with you. I made it a little while ago but have had a few problems with my internet connection and therefore have been unable to upload anything for a while. Anyway, here is a card I made using my new 'spinner card' template.

The template was a present for my birthday, which I believe was purchased from QVC, but I cannot tell you currently what brand it is. As soon as I locate the packaging I will add the information to this post.

I decided to use a Penny Black image as I have not used one for a while and I coloured it in to co-ordinate with my My Minds Eye background paper.

I then simply added some gemstones to finished the card off.  Behind the cat in the inner circle of the spinner are some Anita's stickers that simply say Happy Birthday. Then I added the Craftwork Cards greeting to the bottom left of the card and coloured that with the same promarker that I used to colour the image.

Here is a proper view of the whole card, which as you can see, is an Easel Card.  I think the whole spinner thing looks great on an easel but works just as well, I have discovered, on a regular 15cm x 15cm card.

Hope you like my first attempt at a spinner card (using a template) and thanks
for stopping by. Hugs xxx

Saturday, April 09, 2011

Ela's First Birthday

Hello fellow crafters and friends

Just thought I would take some time on this gloriously sunny day to upload a few of the cards I have made in the past week or so.

This first one is for Ela Mai's FIRST Birthday and was created using an image from Mo Manning at Digital Pencil Too.

I made an easel card base and then decorated the top. I printed off the image and added the words, then cut a circle around it using my circle cutter. I then cut a slightly larger circle out of diamond mirri card. After I coloured the image using my promarkers, I added some DP to the base card, some flowers and some pearls. I then mounted it the 'circles' to the base of the easel with foam pads.

Thanks for stopping by, hugs xxx

Wednesday, March 30, 2011

1st Birthday Cards

Hi girls (and fellow crafters)

I'm sorry for my lack of posts recently, haven't been feeling that great and my mojo was seriously lacking inspiration.  Anyway, RWO colleague's at work asked me TWO 1st Birthday card's and this is what I came up with.

I used one of Mo Manning's digi images and you can see this one and many more of her great creations at Mo's Digital Pencil Too. I made both cards using the same image but you will see that both cards are very, very different from each other. The first one is for Ava.


The second one is for Heidi.  Heidi's card is an easel card and I added lots of flowers whereas I didn't think Ava's card needed the little extra bits. However, saying that, I like them both for different reasons. Ava's card is very simple and Heidi's is a bit more decorative.

It's not much to look at when the card is flat but when it is standing up, it looks much more decorative.

I hope you like them. They were well received and I think that the parents of both of these little girls will appreciate their one-of-a-kind-ness.

Thanks for stopping by. Hugs,

Tuesday, March 08, 2011

Wonderful Wife

Hi fellow crafters

A friend of my husband's, Mark, asked me to make a card for his lovely wife, Patricia, who's birthday is on 17th March. I was going to go with a St Patricks Day 'green' theme but thought as it was a card from a loving husband to his wife, I would make this instead.

I followed this week's 'sketch' challenge from The Teddy Bo Challenge, supplied by the wonderfully talented Kathy. Anyway, without further ado, here's my card.

I used the sketch provided on the Teddy Bo Challenge blog and then printed off Teddy Bea and coloured her with Umber, Cinnamon, Tan, Poppy, Blush and Ivory promarkers.

The DP is from My Minds Eye and the letters were drawn and cut individually by hand onto glittered adhesive sheets. The little scrolly thingies were cut using a Marianne Creatables template and my Big Shot.

Hope you like it?
Hugs xxx

Monday, March 07, 2011

Loving Wishes

Hi girls (and fellow crafters)
Still recovering from my recent operation so haven't made any cards at the moment, but it has given me some time to edit my photographs of recent cards and put them up here for you to see.

This card was made with some wrapping paper left over from Valentine's Day and Coco bear from Digi Stamp Boutique. I cut the square scrolly thingy myself using a handmade template and mounted the image onto black mirri card as I did with the ribbon at the bottom.

I coloured Coco with Promarkers: Ice Grey 1, 2 and 4 and Cool Grey 3 and 4. Pear Green, Grass Green and Cardinal Red with a bit of Blossom on his ears. I then added a simple black print greeting from Craftword Cards.  Apart from that... job done!

Thanks for stopping by. Hugs xxx

Saturday, February 19, 2011

Coffee and Cream Combo

Hi girls (and fellow crafters)

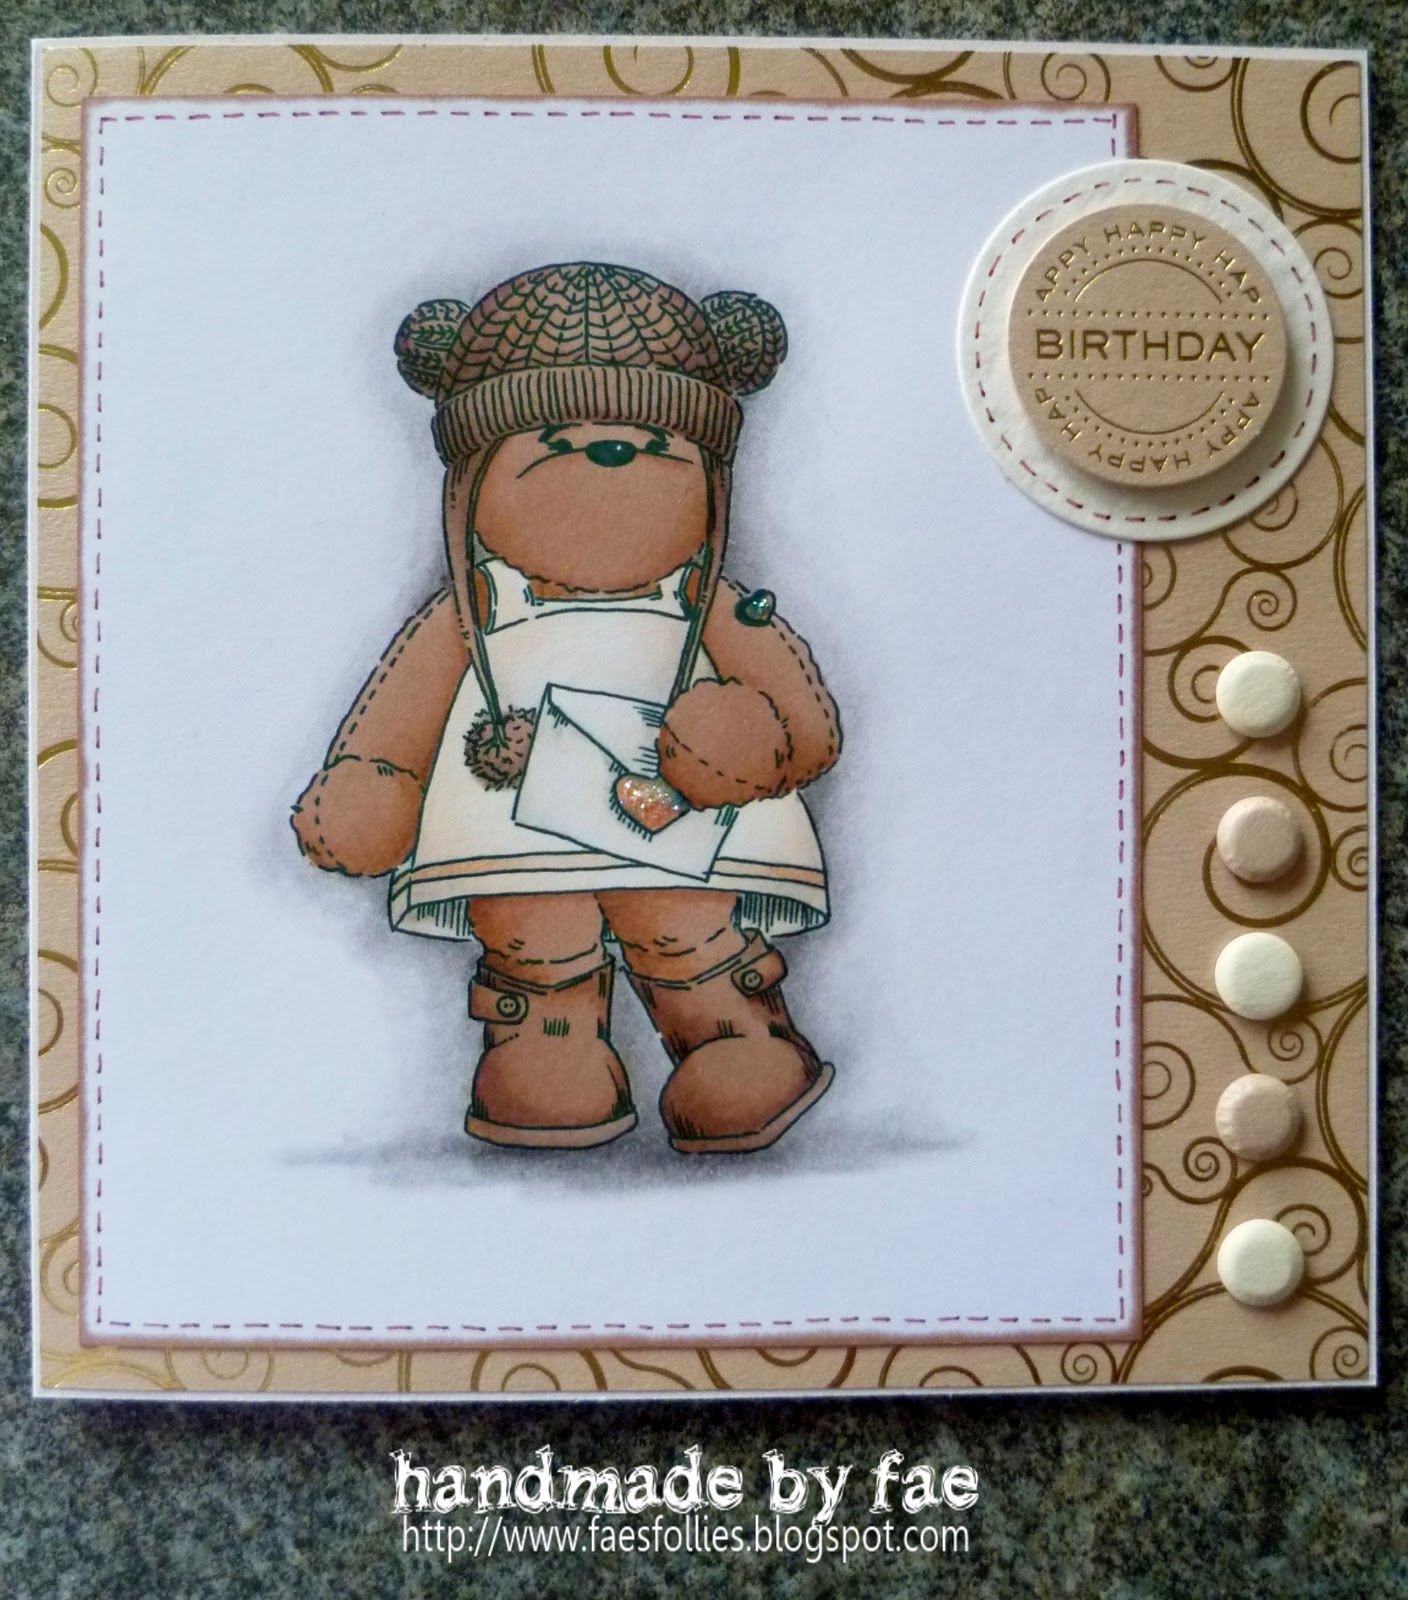
Here's my offering for today. I am entering this card into the Passion for Promarkers challenge 'Coffee and Cream' colour combo.  I am also entering him into the Teddy Bear Stampers challenge, which is also a colour combo using 'Brown, White and Pink. Well I have used the Blush colour on her dress and the heart so that is a very pale pink... hopefully it'll be acceptable???

I have used a new digi image (Teddy Bea 008) from  Fairy Doodlers. Isn't she cute? I have seen a few of these bears around (during my blog surfing sessions) and loved them so much that I had to have one (okay...you got me... I got several... well I do get paid on the last Friday of the month WAHAYYYYY and that's next week!). Anyway, here's what I did:

I printed the bear and coloured her with the following promarkers ONLY: Senna, Umber, Cocoa, Cinammon, Blush and Ivory. The grey background was created using a black pencil and Sansodor. Well, I haven't used it for a while and I thought it was about time I did!

Then I scrolled around the edge of the white with my Cinnamon Promarker and added faux stitches using a 'normal' brown felt-tip (that was painful, how did I ever cope with 'normal' felts they seem to drag SOOOOOOOOO much and scratchy, don't even get me started on that!). Sorry, I am waffling again. Next I mounted some DP onto the white base card using some cream and gold embossed paper that I got from Craftwork Cards and added 5 Candi in coffee and cream colours (well I DO like my coffee the colour of GNATS ****, I'm a latte with a lotta latte kinda gal) and then added the sentiment that was also from the same collection at Craftwork Cards.

In fact, FYI, the paper, the candi, the sentiments and other things all came in a bumper pack from Craftwork Cards so pop over and check it out as they have some amazing offers on their bumper packs and it's very reasonably priced for all the stuff you get with it.

Hope you like the card? It's cold and wet here in Watford today, so doubt I'll be doing much else other than card marking, so prepare to see more of me. I'm sure that'll upset Steve enormously but hey, a girl's gotta do...what a girl's gotta do (ain't she?)

This card won The Teddy Bear Stampers blog challenge, AND got TOP FIVE at Passion for Promarkers and (because the original winner didn't come forward to claim her prize) it also WON! and I received a £10.00 voucher for Joanna Sheen. WAHHOOOOOOO!

Thanks for stopping by,
Hugs x

Wednesday, May 19, 2010

Neopolitan Delights


This is a card that I have made for the Teddy Bear Stampers Blog Challenge.  Their challenge this fortnight was to create a card using the sketch and the colours were blue, pink, yellow and brown.  Not a fabulous colour combo but I rose to the challenge anyway, oh... and of course, you have to have either a digi stamp or rubber stamped image of a teddy bear.

Initially, I was going to try and make this challenge combine with the Penny Black Challenge too, but I love this little Lili of the Valley bearsoooooo much that I just really wanted to use him for this one. And I think it turned out pretty good. I used my large scalloped circle nesties and created a pink and a brown layer (you can just about see the pink scalloped layer above the brown one but under the white circle with the image) and I stuck them all together.

I then cut some baby blue cardstock and border punched it with my Martha Stewart Doily punch and then added some blue and brown circle ribbon to it and finally I added the flowers with the pearls.  To finish the whole thing off I then added some brown and blue coloured gemstones to the top of the doily punch circles.

Saturday, March 20, 2010

Just the 2 of Us

I made this card using the sketch on the Sketch Saturday Blog. Sadly I wasn't able to get my entry uploaded in time for the challenge but I had great fun using the sketch nevertheless.

This was made with another of my Forever Friends stamps and my promarkers. I cut the oval by hand and then added the stamped image which was then coloured with Pro markers pens. I then added the sentiment, the flowers and mounted the additional hearts onto foam pads for a raised effect. I was really pleased with how this one came out and I think I would like to use this sketch again for another project. Really pleased.

As I am still in time for the Blog Challenge over at Teddy Stampers, I would really like to enter this one into their challenge which is "To Mother with Love".

Saturday, February 06, 2010

Ice Cream Sundae

Here's the card I made for Passion for ProMarkers challenge. Hope you like it. I love this image from Whipper Snapper Designs and I coloured it using my Cinnamon, Ice Grey 1, Blossom and Green ProMarkers.

Sentiments are from a collection of clear stamps I have that no longer have their label with them so I am not sure who made them (perhaps Hero Arts?)

Saturday, December 05, 2009

Have a MICE Christmas

I can post this card to my blog now that I have snail-mailed it to the recipient. Hopefully it will arrive in the post before she see's it on here. It looks much better in the flesh than this picture is doing it justice. I had the glittered numbers that I had purchased from Tesco and I made the letters myself following the same font as the numbers and then coloured them with glitter. The image is from Mo's Digital Pencil which I cut out and mounted once I had coloured it with my ProMarker pens. I then added the background paper before mounting it. It really does look much better than it looks in the photo.

Click on the image to see a larger version. I haven't compressed it so that you can see it in more detail.

Thank Y'Owl

Here's another version of Dustin Pike's owl. This owl is just too cute. I made the back- ground myself by drawing 'love heart' leaves and then colouring in the background green and colouring in the leaves with my Promarker pens. I then printed the owl image (digital image freebie) and then coloured him in and cut him out. I then mounted him with foam pads and added a little sentiment to his feet.