Followers

Thursday, December 29, 2011

Colouring Tutorial by Bev Rochester

Hi girls and guys
I found the video by Bev Rochester that I mentioned earlier on You Tube.

I hope Bev doesn't mind me sharing it with you all on my blog, but it is on You Tube so hopefully she won't. She's such a talented lady and her cards are always just so beautiful, so the fact that she is sharing this tutorial with us is brilliant, and she teaches it so well, it's very simple to follow.

There are other tutorials from her on You Tube so be sure to check them out too.

Here's the video link
http://www.youtube.com/watch?v=EdcRu2fOTgI&context=C358e633ADOEgsToPDskLa2O_2g4PVJheiVkHDOWGO

Thanks for stopping by.
Hugs

Steampunk Girls II

Hello again,

This final card that I have made today is as the previous card, but in blue, and boy what a blue...

As before I cut out the topper card twice in two sizes. The first  I cut out in a really rich, vibrant blue and the second, slightly smaller piece I cut from white, with the printed image already on it.

I then added the colour to the edges using Impress 'Cerulean Blue' and a make up sponge.

Next, I coloured the image the same way as I did with the 'red' card and added another piece of the blue card to the base of the easel and then added a greeting and some ribbon. The edge was created with the Martha Stewart punch again (as before). I also added some pins.


Here's a close up version of the card closed and the smaller photo is of the easel standing up.

Thanks for stopping by again

Hugs and kisses

Steampunk Girls I

Well, I'm back again with the second of my cards that I have made today.  This card and the next are made using the same Digital Image from Tiddly Inks, but both cards are in different colours. One red and one blue.

I love these steampunk images. They look so fabulous and once again I have added the pleats and folds with my promarker pens and Derwent pencils, blended together with Sansodor.

I used my lovely die cutters again to cut out the topper card and printed the image onto one of them in whte and then added the Strawberry Fool with my make up sponge to the edges, as before.

I then added some Card Candi from Craftwork Cards in a graphite grey and made the backtopper in Graphite Grey aswell.

I then added another bit of the same card to the base of the easel and edged it with a Martha Stewart punch and added some ribbon.  I then added another greeting from Craftwork Cards so that the easel can stand up when opened.

Here is a photograph of the card when it is flat(ish) and I think it looks really effective especially against the scalloped base card.

And finally, here is a close up of the image so that you can see the detail more clearly.


The next card is almost identical but using the colour blue.

Thanks for stopping by and visiting, hope you like the card.

Hugs and kisses

Winter Fairy Talva

Hello fellow crafters and creative geniuses...

Well, hopefully as you can see, Santa bought my creative mojo back and I have made not one, or two... but THREE cards this morning, which I am really pleased with as they all turned out exactly as I pictured them in my head.

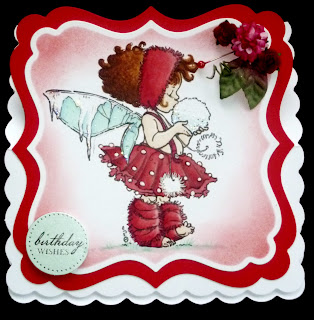
The first is using a new digi stamp from the ever talented Mo Manning over at Digital Pencil Too. Those of you who know me, know that apart from Vampires and all things super natural / paranormal, I absolutely love Fairies, hence my name. So here is a card I have made using one of Mo's winter fairies.

I decided to make the card an easel card and used my scalloped edged card bases from Craftwork Cards to produce it.  I used my large die cuts to create the topper cardstock and then cut out the image using one of the smaller ones. After cutting the image I kept it in the frame and then inked the edges using a make up sponge and some ink from one of my pads (Strawberry Fool from www.elzybells.co.uk)

I coloured the image using my promarker pens and added a little glitter to her wings.

I then added some gems to stand the easel up and a greeting and some ribbon. I  decided to make the greeting the same colour as her wings as I think there might have been a little too much red on it otherwise and I think the blue breaks it up just right.

I think I might get quite a bit of use out of this stamp as not only is it good for Christmas but I can also get away with using it for winter birthdays etc.

Anyway, I hope you like it and to finish the whole thing off, I have added a photograph of the whole card closed, so that you can see more detail rather than just the open card. If you click on the image it should bring it up even larger for you so that you can see how I have created the folds and pleats in her skirt, using not only my promarkers but also by using my Derwent pencils to create shadow and light. Hopefully I did it correctly, I found this brilliant tutorial on You Tube. If I can find it again, I will post it here so that you can see what I followed. Although I know most of you out there are already very capable of producing brilliant cards, some might find the video useful.

Hope you like it and thanks for stopping by today.

Hugs and kisses.

Tuesday, December 27, 2011

Christmas Wishes

Hello fellow crafters
Just a quickie to hope that you all had a lovely Christmas and hope that you all have a happy new year too.

Hugs

Thursday, December 22, 2011

Three's Company


Hi guys and girls

Just adding the last three cards to my blog. These are using the same images that I used before on my previous posts of the past few days, just coloured a slightly different way, using different colours and mediums, so it should give you an idea of how versatile they are.

I know that some people don't like digi stamps but I love them because a) they're easy to store, b) they can be resized so whether you're making a 4 x 4 card or an 8 x 8 card, you can adjust the digi to fill the space as little or as much as you like and c) you'll get a perfect print every time, the amount of stamped images I have had to decoupage or simply through away because the stamp hasn't been inked up enough is more than I can count.

Nevertheless, saying that I still like to get my wood and clear stamps and my ink out now and again just so that I can get a little messy.

Anyway, here are the latest pictures for you to view.
Hope you like them?

Thanks for stopping  by today, hope the weather is as mild and glorious where you are as it is here today. That winter sun is so beautiful and it really is much warmer today than it has been in weeks.

Only three more sleeps until the big day, hope you all get what you want from the big red guy.

Hugs xxx

Monday, December 19, 2011

Grey and Pink Christmas

My third card today is a grey and pink theme.  I decided to do something less traditional, i.e. NOT red and green as I was getting really bored of colouring everything red and green. So I took this Cuddle Buddly digi stamp and coloured it entirely in shades of grey and pink.  The background paper is also pink and black and is from Craftwork Cards.

Again, this card is for one of Jane's Niece's so I didn't want them to be the same. 

This is another really simple card.  There were just too many orders to get too creative with else it would have been soooooo time consuming that I decided to keep them all really simple instead, but I think they are all still really cute and look so much better in real life.  The photographs just aren't doing them much justice.

Here's a close up view of the same card. As before, I have really taken the close up image so that a) you can see the way I have coloured the image and b) you can see the detail and quality in the digi stamp. 
 
They have so much detail and I just love them so much. Can't praise them highly enough.

This image was coloured with my Copics, Promarkers and Derwent watercolour pencils. So many mediums used here. Can't decided between my Copics and my ProMarkers as to which I prefer to use, although I must say that I love the really thin brush end of the Copic pens, as you can really get into the smaller details of the stamps with it and you don't have to put too much pressure on the brush end to get a decent coverage.
 
Hope you like it and thanks again for stopping by xx

Huge Present

This next card was also requested by Jane, for her niece, in fact, most of the cards I am posting today were for Jane.

She wanted to give a handmade card to her Niece as she didn't like any of the shop bought ones.

The image is a Cuddly Buddly image again and this time I coloured it with my ProMarker pens coupled with my Derwent colour pencils.

Yes... Santa did come early for me this year. He bought my Derwent pencils and a certain hubby has let me have them early... bless him. Probably got fed up with hearing me go on and on and on about them and gave in just to shut me up if the truth be told.

Here's a close up of the image again so that you can see the amazing detail that the artist has put into it. Despite this her digis are amazing reasonable. Which is also a very good thing as I love using digi stamps now. I can't remember a time I last stamped, which is a shame, because I love stamping too, maybe I'll get back into it after Christmas when I can get my stash supply back into my kitchen. Hopefully this year, I will be able to get my garage emptied so that I can finally have a proper craft room.

Anyway, that's card number 2.
Hope you like it and thanks again, for stopping by.

Hugs xxx

Christmas Couple

Hi girls and guys

I have been really busy this past month, with loads of orders for Christmas card and various other cards. I have picked out a few of my favourites and will be uploading them shortly for you to view.

I hope that this last week run up to Christmas isn't too stressful for you and hope that you are all feeling a little bit (if not... a lot) of Christmas cheer.

Here's my first card that I want to share.

My friend Jane asked me to make a nice card for her mum and dad so I decided to use one of these gorgeous 'Cuddly Buddly' Digi Stamps. So well drawn and so, so cute.


I coloured the image with my Copics and my new Derwent Albrecht Durer watercolour pencils after printing the image on my computer. Here's a close up of the image so that you can see the colouring a bit better and see the image more closely. Isn't it lovely?

Hope Jane's mum and dad like the card. My poor parents and family members got... please don't hate me... SHOP BOUGHT CARDS this year as I had way to many orders to cope with them and my family too. Sorry Mum, love you xx

Anyway, that's card number 1. Watch this space, there's more. Thanks for visiting my blog today and I hope to see you again soon.


Saturday, November 26, 2011

Dominic's Dinosaur

Jane at work asked me to make this card for her Nephew, Dominic. Apparently he's a big fan of the T-rex from Toy Story, so I googled free colouring pages of this dinosaur and coloured him in with my Promarker pens, then cut him out and mounted him onto yellow card, I then added a round red sun and added some slightly purple grass. Why purple you ask??? Well, when the sun sets, it does look a little bit purple...don't you think? Anyway, I wanted to steer clear of the usual BLUE for boys colour scheme and thought this green dinosaur on the unusual background did the trick nicely.

Jane was well happy with it anyway, and that's all that counts really. Hope you like it too?
Thanks for stopping by.

Lili's Flowers

Hi guys and girls
Here's another really simple and quick card I made for Elaine's birthday. Just some really simple background paper, a Lili of the Valley image, that I coloured with my beloved Promarker pens and I mounted that onto red card and then I added some paper roses. Et voila!

Hope you like it?
Thanks for stopping by.

Friday, November 25, 2011

Mum's Birthday

Hello again
Here's the upload I promised.

This is a card I made for a friend at work, Jane. It was her mother's birthday and she wanted an 8" by 8" card so I had quite a bit of space to fill.

The background paper is from a bumper pack from Craftword Cards and so was the greeting attachment. The ribbons were from my stash (god knows where I got them as I now have three rather large bags full of ribbons) and I cannot for the life of me, remember where the image was from either (sorry). I coloured the image with my promarkers and cut the letters out by hand before running them through a Cuttlebug folder on my BigShot. I then mounted the image and added some card candi.

Fingers Crossed

Hi girls and fellow crafters
Well, it's been a long time since I last updated my blog and although my health has been pretty naff of late, I have still managed to make the odd card so watch this space as I upload them over the next few days.

I would like to take this opportunity to thank everyone who has been in touch by text, email, blog and by my Facebook page, to wish me better and to let you know that I am indeed, feeling much better than I have done in such a long time... so fingers crossed, all is okay now and I can move on with my life.So, I am back and fighting fit.

Just one more thing before I sign off, thank you for staying with me, and for your wonderful, kind and caring patience. It is appreciated more than you will ever know.

Friday, September 23, 2011

Little Message

Hello fellow crafters
Just wanted to write a quick note of explanation for my absence as I have noticed that it has been over a month since I have been online.

For those of you who know about my stroke in July, I have since been having MRI and CT scans galore and so many blood tests, I feel like a pin cushion. I have also had ECGs and an Echocardiogram. I know most of the nurses at the hospital by name and this week I have had cold and flu symptoms, which manifested themselves into a full blown cold.  So, as you can imagine, the last thing I have felt like doing is making cards or crafting. I just wanted to say, thank you for being loyal followers and thank you for your lovely messages.

I'll be back soon, I promise x

Monday, August 22, 2011

Forever Friends '3D' Challenge

This fortnights challenge from Forever Friends is a 3D challenge and is sponsored by Stitchy Bears.  I decided to make my card on an acetate base and then added several various layers.

Here are a few images of my card so that you can see the different layers.  I decided to stick with a pink and black theme as the fairy is just too cute to be any other colour than pink.

I added a sentiment from Lili of the Valley and the background was cut out using a Martha Stewart around the page punch. The black circle scallop was cut out using a large scalloped nestie.

I am so sorry but I can't be sure who made the back ground paper, but I think it may have been Pink Petticoat???

Thanks for stopping by and don't forget to pop over to the Forever Friends blog and have a go at this fortnights challenge. Remember, you do not have to use a Forever Friends image in order to take part, you may use any stamped image, as long as it's an animal of some kind. You never know, you may win, but you have to be in it to win it. Good luck!

Sunday, August 14, 2011

Lovesick Blues

Last but not least (I promise...) for tonight anyway, here is the final card.


I made this card using a Lili of the Valley image and can't remember who the sentiment is by as it is currently loose and has not been put back with it's set. I added some flowers to finish the card. Sorry I cannot go into more details peeps, but it IS 23.15pm on Sunday evening and although I should've been in bed ages ago I just had to get these cards uploaded before I put it off any longer. I'm done... I promise. Night night x

Thanks for stopping by,
Hugs,

Card for FIN

Hi peeps
Me again, with yet another piccie of a card photographed on my Blackberry. Oka so I know I'm no teckie bod, but give me some credit for working out how to download them from my phone to my laptop, even if they were taken about a fortnight ago!!!! JEEEEEEES!


A friend of mine, asked me if I could make this for a friend of her husband's who is (apparently) a BIG fan of rugby. Unfortunately, unbeknown to me, when I 'googled' RUGBY BALLS to get an idea of what they looked like, it also came up with SOCCER BALLS, and who am I to know the difference??? Having never played it in my life and when I watch England play, I can hardly be blamed for not exactly watching the ball, when all those fit men, I mean legs, I mean PLAYERS are running around.

Anyway, despite my 'little' error the card was very well received and Fin was very happy with his card.

I hand drew the ball and coloured it with my Promarkers. To get the dimpled effect I went over the colour with my Blender pen and I was really pleased with how it looked.

Thanks for stopping by,
Hugs

Despite her Attitude

Hi girls
Another card from my Blackberry that I haven't yet uploaded. This card was also made for Lianne's 14th Birthday, but this card was given to her from her brother Lewis. He had a very clear idea of what he wanted to give her. He knew that this Lili of th Valley image definitely had Lianne's (attitude and) name written all over it. He knew greens and purples were her favourite colours (but we opted for green) and that he wanted it to be a shaker card (he has a thing about shaker cards, bless 'im).


AND... he especially liked this sentiment from Create with TLC so he wanted it to appear on the front rather than inside.

Hope you like the cards and thank you for stopping by.

Lianne's Birthday Card

Hi girls
Just a quickie as I took this photograph with my Blackberry rather than my camera and have only just managed to upload and edit it.


I made this card for Lianne's recent 14th Birthday. She seemed to like it as it has been added to the ever growing pile of 'Cards-We-Want-2-Keep'. She had a really nice day despite her mummy havinf a stroke just 10 days before, but we still managed to make her day a special one. Even if it did cost me a small fortune, she's worth it.

Monday, August 08, 2011

Devoted & Dashing Dad


Hi girls (and guys)

This fortnights challenge on the Forever Friends challenge blog is to create a ROUND CARD. Remember, you don't have to use a Forever Friends image if you don't have one as long as you use an animal.


This fortnight's challenge is sponsored by Di's Digi Downloads and she very kindly gave the DT some images to use on our creations.  As you can see, my card is not exactly a round one but the front of the easel is. I had originally made the easel round as well but I wasn't happy with the finished result. So I remade it with a square base and a round easel and I think it worked out well.

I used a selection of different papers, merged the digi image with a sentiment from Create with TLC and coloured the image in with my promarker pens. I added a round birthday sentiment from Craftword Cards and job done.

Not entirely happy with the finished result, I reprinted the image again and coloured it the same way as the original and decoupaged the bear only to the front.


Here's a slightly smaller image so that you can see the decoupaged area.

I hope that you will decide to join in the fun this time and good luck.  I hope you like my card that I created for the Design Team.

Thanks for stopping by, hugs xxx