Followers

Showing posts with label Digital Images. Show all posts

Tuesday, November 30, 2021

Another Bloomin' Lockdown...?

Hello, My Crafty Followers

I've been a little bit lapse in blogging recently haven't I? So much has happened, that I feel I haven't had a moment to catch my breath!

First of all, my laptop broke and it's not that easy posting to my blog with my iPhone, so I've basically been waiting for a decent Black Friday deal to come along, so that I could purchase the latest tech at a fraction of the price. Crafty eh? So, I'm now back online and raring to share with you all my cards and news from the past few months.

Lianne and her boyfriend Matt got engaged in October, so I've been very busy planning a party with her for the New Year plus, I've been creating her engagement invitations and looking at venues for the wedding! It's all very exciting, although I doubt very much that the wedding will actually be taking place in the very near future. I think they're hoping to have a long engagement, to really get saving for the wedding that they actually both want and to take a little bit of pressure off of me and her dad. Bless! 

Anyway, as well as that I have been very ill (on and off) for a few months but, I'm feeling much better now and feeling more like my old self. So, that being said... here's a few cards I have recently made.

I haven't made a monochrome card for a while. I actually forgot how much I enjoyed making these. I made the card to go with the sentiment...

'Every day may not be good...
but there is something good in every day.'

I thought that making the card in monochrome it would somehow reflect what was being said. Does that make sense? I hope so,  because I knew what I meant in my head... hahahaha

It's a swing card where the centre piece remains attached to the crease of the base card but the two sides and the bottom are cut away from part of the front, so it literally swings! Cool huh?

I obviously only 'coloured' the LOTV image using grey and black Copic markers and added some black flowers, ribbon and mounting card, plus a few black adhesive flat backed pearls. I really loved how it turned out in the end and was pleased to be able to send it to my 'Goth' Niece for her birthday, which was really well received. Bless her.

My next card is this rather cute digital image from LOTV, on Etsy. One of my favourites, as this image can literally be used for just about any card, with a few exceptions.

This card was made for my wedding anniversary. We've been married 29 years this year and, I wanted to make something cute for my husband, as he has been so supportive through various times this year, despite being rushed off his feet at work. I wanted a black and pink theme as I think the black really sets off this bubblegum pink cardstock beautifully.

First of all, I ran the black base card through my BigShot Plus, sandwiched between an unbranded A4 'spotted' embossing folder. I then coloured and mounted the image onto the same black and pink cardstock, and cut out some stars to match. 

After mounting, I adhered some pink and black spotted ribbons.

These lovely little digital images from LOTV are so easy to resize on the computer and print.  I like to download them to my desktop and then open a windows or pages document. Mainly because by viewing the document as one page, I can get a rough idea of how large the image is going to appear once printed. I usually, as a rule, like to print off two per page, as my preference is to make 8 x 8 inch cards, but that's just me... you may prefer to print 4 per page or maybe even one, if you're making an A4 card.

Once I had the images positioned where I wanted them, I printed them off onto quality cardstock and proceeded to colour them with my Copic Markers. As you can see, I made the little boy bear have a matching bow tie to the little girl bears tutu, ribbon and shoes.

I then added some sparkle with a little bit of unbranded glitter glue that I purchased from a company called The Works. 

Side note... The Works has a very large bottle of clear glitter glue for £2. I think it's approximately 500ml, which I think is a fantastic price considering I use the stuff on almost every card I make. Hahaha

I coloured the young gentleman bear in a grey pinstripe suit and coloured both of the bears brown. I appreciate that some people like to do their bears in grey but, I personally like to make them always in brown, as I have a lovely little brown bear, that sits on my desk who, I think, rather looks like these LOTV bears.

Quite a long post this evening, I hope that some of you are still with me? I hope that you have liked these two cards and I look forward to posting a few more over the next couple of days.

Please remember that from today, here in the UK, it's compulsory again, to wear face masks in ALL shops and on all public transport, until further notice.

Take care and stay safe
Hugs, Fae xx

Saturday, July 14, 2018

Techniques with Kit & Clowder

Just a quick note

I realise Father's Day was last month in the UK, but I've just noticed that I didn't share my Father's Day card with you. I don't know why I didn't post it because I was really pleased with the outcome.

I don't know if you are aware, but I am a member of Kit and Clowder? Alyce Keegan does the most amazing tutorials each month for a nominal fee and teaches us so many new techniques. Each class has a pdf downloadable and printable booklet, many 'how-to' step-by-step videos to assist you through each step and sometimes free digital stamps or money off coupons/vouchers to purchase the stamp being used in the class, if you wish (although this is helpful, it is NOT compulsory and the class techniques can be applied to any stamp you have in your library / collection). My most favourite one to date is texturing.  I thought I would make a Father's Day card using some of the new techniques I have learned in the last few months.

I used a digital image from Mo's Digital Pencil - Mr Fixit and coloured the image in with my Copic markers.  I freehand drew on what I thought would pass for a 'six-pack' and chest muscle and then proceeded to add texture and shading to the t-shirt using my markers and the techniques learnt. Added a denim texture to the jeans and coloured in the rest of the image as I would normally.  To add the shaded area behind him, I used a dark grey Prismacolor pencil and some Sansodor which I blended with a blending stump. To add a little more depth, I then went over a small area closer to the image with a black Prismacolor pencil and again, blended with Sansodor.

I then cut it out with a circle cutter and again, slightly larger, with a background colour.  I then printed the sentiment and mounted onto matching background paper.  I then mounted two silver, glitter stars to finish it off.

Hope you like it?


Monday, July 02, 2018

Lazy Summer Days

Hello fellow crafters,

Here's a card I have made this week using a gorgeous image from Mo Manning called 'A Secret' and it can be found here.

I am entering this card into the following blog challenges:

Crafty Gals Corner - Anything Goes
Dragonfly Dreams - Summer
4 Crafty Chicks - Anything Goes (Summer)

I used Copic Markers to colour her and used Prismacolor Pencils and Sansodor to blend for the background and the sand. Kept the layout fairly simple and added the sentiment, which was included with the digi stamp.  Finally, I mounted her onto blue card and then again onto blue glitter card to finish it off.  Background paper was from my stash, unfortunately I can't remember / don't know which brand it is.

Hope you like her...?

Want to colour better?
The techniques I have used here, on her jeans and background, for example, have been learned through a Copic Colouring class I subscribe to, with the lovely Alyce through www.kitandclowder.com, she is very supportive, extremely talented and has so many different techniques on offer to assist you with your colouring growth.  If you want to join up, her classes are very reasonably priced and you are able to cancel at anytime. Kit and Clowder also have a Facebook group and Instagram.

Thank you so much for visiting today.
Fae xxx

Friday, October 26, 2012

Little 'Blue' Peep

Full version of the front of the card
Well I can't believe another Friday is here already... where does the week go?

I have been convalescing at home for the past month due to health reasons and I can't believe that we are turning the clocks back this week and November is practically upon us. I'll have to get out my book of spells for next week and my broom could do with an airing. Maybe I'll take it for a pre-Halloween (hypothetical) spin this week to blow out any cobwebs.

Anyway onto today's card... I have decided to enter this card into the following challenges:

Fashionista Challenge - Anything Goes
Passion for Promarkers - Pets Theme


Close up view
I started with an 8" by 8" white base and then added some papers from my Grace Taylor 'Blossom' 12 x 12cm scrapbook pad.  The blue paper with the text I am not sure the origin of... sorry! I layered the blue and the circle of brown directly onto the base card and then used a nestie and my Big Shot to cut around the image.  I used my Promarker pens to colour in the digital image (Jules from the Saturated Canary) and then I mounted that to the front of the card too.  I then added all of the embellishments; gemstones; flowers; brad; pins and coloured adhesive pearls, not to mention the Craftwork Cards Happy Birthday Sentiment which seemed to match the shape of the nestie (well...almost).

Hugs Fae xxx

Friday, July 20, 2012

Big Girl

Hello Peeps
Another card that I have made for Lianne's 15th Birthday, next week, that I thought I would enter for Mo's DP2 Challenge #144 Hugs 'n' Kisses.

This is such a lovely image from Mo Manning over at www.mosdigitalpencil.com, she's called 'Big Shoes' and you can purchase it here.

The background papers used are from a paper stack called BLOSSOM from Grace Taylor, which was a recent purchase from Hobbycraft. The sentiment used is from Create with TLC and was a digital freebie.

Thanks for stopping by.
Hugs

Thursday, February 16, 2012

Marvellous Mothers

Another card that I have made for a work colleague, for Mother's Day is using a Digi Stamp Boutique image.

The background paper is leftover scrap and I'm really sorry, but I cannot for the life of me, remember who created it.

Anyway, I printed the Digi Stamp Boutique image off twice and decoupaged the top half of the image. I added some ribbon to the base of the card and coloured the image with my Copic Pens and Derwent watercolour pencils.

I hope that you like this card and I thank you once more, for popping by and visiting me today.

Hugs xxx

Saturday, January 14, 2012

Sleeping it off...

Hello again

My next card for today is another male card.  This time I used a digi image rather than a stamped one.

I really like this image and it is available here at Di's Digi Downloads. He's called 'Beer Bear'.

I loved this background paper and have had it for ages as it seemed to overpower anything that I put with it,. However, with this image it seemed to compliment it perfectly so I was really pleased with the overall outcome.

I then added a Craftwork Cards greeting, which I coloured in with a Promarker to compliment the colours used.


Finally, I added some Card Candi which I also coloured in with the same Promarker colour. Job done!

So... what do you think of my male cards so far? Too young still? Watch this space, there's more to come.

Thanks for visiting me,
Hugs,

Friday, January 13, 2012

Kitchen Knight

Hello again, it's me... I'm back

Here's another card made with a digi image from Mo Manning. It's called Kitchen Knight and you can find him here

I decided to colour him in in blues and reds and I just love that sleepy ol' dragon.

I mounted the image onto two colours of blue and added some thin ribbons down the left and along the bottom of the image. I then ran a strip of the same blue card through the BigShot with a Cuttlebug embossing folder to achieve the raised 'dots' effect and stuck that to one side of the 8x8 card blank.

Next I coloured the image using my ProMarker pens and my Derwent Watercolour pencils and some Sandodor to blend it all together.  I love the way the colinder 'helmet' and the saucepan 'shield' came out. It really looks good in the flesh!

I wish I could get the photographs to be a true depiction of the colours I have used as these look a little muted by comparison.

Anyway, it makes a nice change to make a card for a child.  I think I might have to make a male card next. I haven't done one of those for a while and I hate doing them unless I am specifically asked to make one, so I think my January CHALLENGE to myself would be to make a male birthday card.

In fact, during most of my blogs visits lately, I have noticed that almost ALL of the cards have been girlie and rarely anything for male birthdays.  I think others should be making a few male cards aswell.

I hope that you like my card and thanks once more, for stopping by.

Hugs xx

Saturday, January 07, 2012

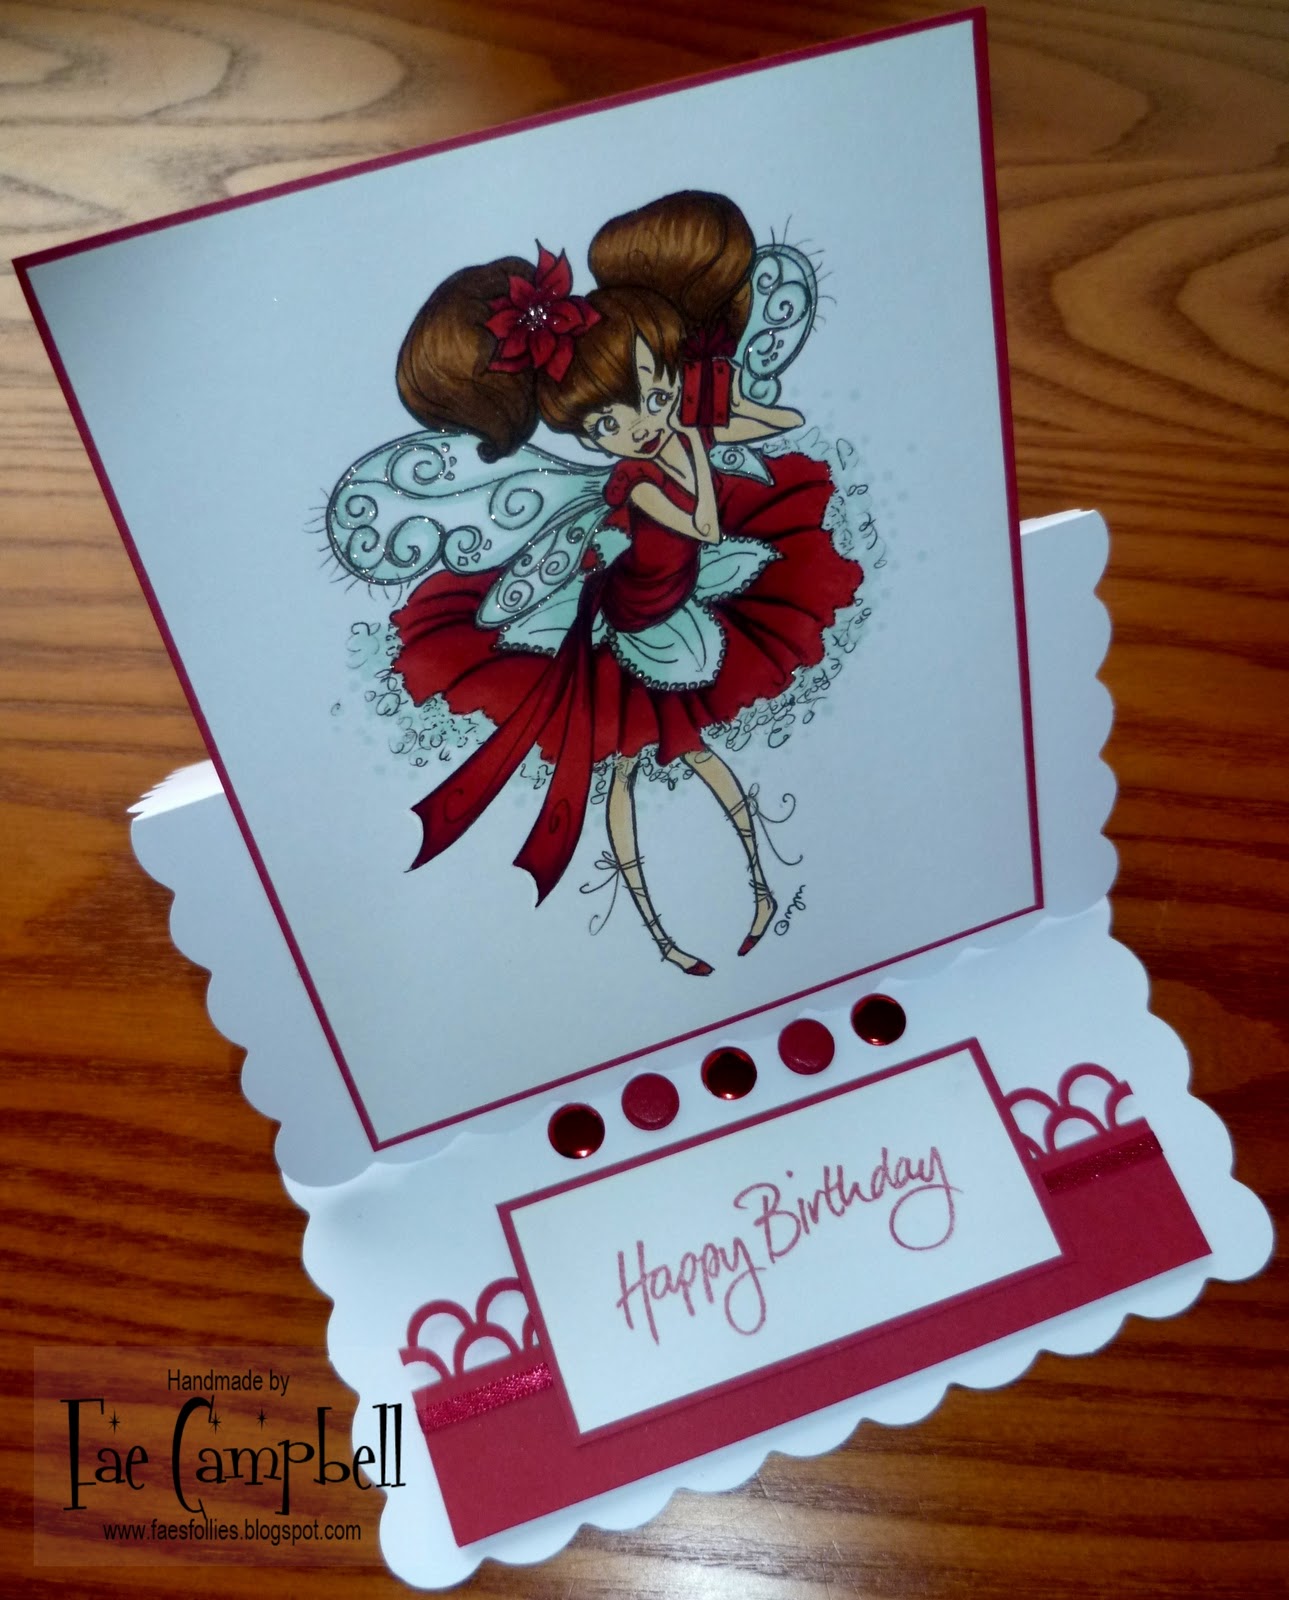
Fairy Pia


Hello again

This card was made using one of Mo Mannings (www.mosdigitalpencil.com) images. She can be found here

I just love using digi stamps as they are so easy to edit and change the size to suit your card.  This card is 6x6 and I have made it into an easel card. You can see how the easel works in the second photograph, which shows the card open and 'standing'.

This card wasn't made to order, it's just another one for my 'box' at work. It's always handy to have a selection at work so that if someone wants a card as soon as possible, they can generally find something that is suitable AND it's still handmade, which makes it all the more special, plus it gives you the opportunity to get your name and your work noticed.

I do get quite a few orders from people who I don't know, but who have received one of my cards. It's always nice to get good feedback and especially nice when someone you don't know places an order for other cards.

Hope you like my card and thanks again, for stopping by.
Hugs

Friday, March 11, 2011

Peaches and Cream

S'mee again. Here's my final card for today (so far). This card is also made using Coco with Heart by Digi Stamp Boutique (OMG I just love these bears).  I coloured him in exactly the same Copic colours as my previous card. As you can probably tell, I really liked the way I coloured the image on the card I made for Emma's 21st, that I decided to copy it and make another one for this easel card.

I made the easel base and covered the front part and the bottom of the easel base in DP from Craftwork Cards.

The base part I edged with a Martha Stewart border punch and added three large, pink gems.

To the front of the easel card I added some pink and cream ribbon to and used my circle cutter to cut the image out. I then made a slightly larger circle out of holographic mirri card and DSST'd them together and mounted the whole thing to the front of the card using foam pads to give it some dimension.  I then coloured a white greeting (also from Craftwork Cards) in the same Copic colour as Coco's heart and added some flowers using my glue gun.

Hope you like it.
Thanks for stopping by, hugs

Sunday, February 13, 2011

Heidi

Finally, here is my last card for today (so far, there may be more later).

This digi stamp is called HEIDI and is from Victoria Case. I thought this would be perfect for Steve's friend, Mark, who is celebrating his 50th Birthday on the 16th February and the sentiment is just perfect for him too, well... it made me chuckle. I saw this somewhere but the sentiment had not been given proper credit so I did not know where it came from. However, the sentiment I saw was in USD and therefore not really applicable to the UK so... I made my own. If you were the creator of this sentiment, I give you my sincerest apologies for changing it to £'s without proper permission, but as I said, the card I had seen it on had not given credit to you and therefore I did not know if it was a freebie or a sentiment to purchase. Anyway, I hope he likes the card and Happy Birthday for Wednesday, Mark. Jammy toad is off to Las Vegas!!!

Thanks so much for taking some time out of your day to view my cards. Your visit is always a welcome one. Please feel free to comment if you like the card, or not. Your comment is always valued.

Hugs, Fae xxx
P.S. Happy Valentine's Day for tomorrow everyone young and old. Love never ages, it just gets better.

Fun with Coco

And my third AND FOURTH cards for today are...

For this card I used papers from the Pink Petticoat Vintage Rose collection. I coloured Coco with Flowers (from Digi Stamp Boutique) in promarkers; ice grey1, cool grey 3 and cool grey 5, blossom, forest green and pear green.

Job done. Really simple card but I really love it as it could be used for anything. Get well soon, happy birthday, congratulations, maybe even a mother's day card (if I don't get around to making a special one for mum... sorry mum, lots to do etc etc etc, but I will try... I promise!), at a push I could give it to one of the children to give to me since I always have to make MY OWN!!

My fourth card today is also using one of the coco bears from DSB and  for this card I used the following promarkers:

Tan, Sandstone, Blossom, Ruby and Poppy Red, Grass and Pear Green. I added some white spots onto the ribbon with my trusty, (wouldn't-be-without-one) white Jelly Roll pen.

I mounted the image onto black cardstock which I punched the edges of with my heart MS border punch. In case you were wondering, I deliberately mounted the image too far over to the left so that only the top of those hearts were showing as I didn't want it to be TOO symmetrical as the red background paper had a black glitter border that was cut off on one side (as it is scrapbook paper).  I added a black ribbon with red stitching to colour co-ordinate and a sentiment, 'if I give you my heart... can I have yours?' which I made myself on the PC and which I will add to my next post so that you can also use if you wish?

I am entering this card into the Teddy Bear Stampers challenge using a 'love theme' for Valentines. Hope they like it?

Hope you like the cards?

Thanks for stopping by
Hugs, Fae xxx

Shy

Hello girls

Here's my second card for today...

The image is from Maurie Manning at Digital Pencil too and is called 'Shy'. Isn't she adorable? I kept the colour scheme as pink, brown and gold (and used my infamous spotty background).

I coloured her with promarkers; blush, ivory, umber, henna, cocoa, cinnamon, ruby, cardinal red and ice grey 1. And for the bear; cocoa and cinnamon. Hope you like it?

Thanks for stopping by
Hugs, Fae xxx

Mice to see You

Hello girls (and fellow crafters)

So, the past week I have been really busy. I have my nan's birthday coming up, my sister-in-law, an eighteenth and TWO fiftieth birthdays!!

Here's one of my many cards I have made this week. Unfortunately, this is not one of the cards I needed for the list above, but I thought the image was really cute and wanted to make a card with it. The image is from Phindy's Stamps and is a digi.  I coloured it with my promarkers, added an inked background around the image and then mounted it onto plain black card with a small border. The I mounted that onto glittered cardstock. Hope you like it?

Thanks for stopping by.
Hugs, Fae

Wednesday, February 09, 2011

Red and Black Valentine

Hi girls (and fellow crafters)

So, Elaine at work, really liked my Pink and Black Valentine card that I made for my hubby Steve for Valentine's Day, so she asked me if I would make a similar one for her hubby Steve, also for Valentine's Day. So here is my card (for her), only this one is red and black (with a hint of white). Hope she likes it?

I used exactly the same spec as before only this time I used Coco with Heart from the Digi Stamp Boutique. She really liked these bears so I decided to use this image instead of a Penny Black one. I used promarkers: Umber, Cocoa, Cinnamon, Cardinal Red and Ruby.

I am entering this card into this week's Passion for Promarkers challenge 'Let there be love'. Hopefully they will like it? As their DT always offer us such fabulous inspiration. Pop on over and enter the challenge for yourself. It's great fun.

Hope you all like the card.
Thanks for stopping by.

Hugs, Fae xxx

Sunday, January 30, 2011

Flowers and Pearls

Hello girls (and fellow crafters)

So... looking for ideas this morning I turned to my trusted 'Inspiration Jar' to help me out. I pulled out the following: 
  1. Use a Recently Purchased Digital Stamp
  2. Use lots of flowers (on DP, Prima, stamp or charms) I used them on EVERYTHING!
  3. Add lots of bling, gems or pearls (or both)
  4. Colour combi is PINK and ... (one other colour)
So... without further ado, here is what I came up with that I thought I would share with you.  I am entering this card into the Passion 4 Promarkers challenge which this week is, 'Let it Shine' (make a card with bling).

The image is called 'Coco and flowers' and is from the Digi Stamp Boutique. I love these cute little bears. They're 99p each but you can buy FOUR for £3.50 so, of course, I had to have them all (thank heavens for pay day!!!).

 Anyway, back to the card: I coloured Coco with Promarkers Tan and Sandstone. The flowers and grass were coloured with Blossom, Pale Yellow, Forest Green, Pear Green and Grass.  The background paper is by Pink Petticoat from the 'Vintage Rose Collection' and that was a freebie with this months Quick Cards Made Easy magazine. Gorgeous eh? I used the Big Shot to cut the image out using a Circle nestie and then made the silver mount with my new Beaded Circles nestie. I then added mini adhesive pearls to the scalloped edges.

To complete the card I mounted some more silver paper to the left of the card and added some swirls, diamante flowers, prima flowers and jewelled brads (which I got for a bargain of 49p from Hobbycraft in the clearance sale). Finally topping off with a birthday greeting from Craftwork Cards.

Hope you like?

Thanks for stopping by on this gorgeously sunny Sunday.
Hugs, Fae xxx

Thursday, January 27, 2011

When nothing goes right...

Sorry... me again!

This is a card I have made for Mo's Digital 'It's a Color' Challenge.  This week her 'Design Team Member', Elaine, challenges us to make a card using only Red, Yellow, Orange and Neutrals (i.e. Black, White, Off-White). So I made a card using just those colours on a white base card.


I, of course, used one of Mo's Digital images and coloured him in orange PJ's with red stars and a red dressing gown. The box of tissues is yellow as is his hair. The sentiment is from Create with TLC 'When nothing goes right...go left' which is perfect for when you're not feeling very well and nothing seems to go well. I added some DP from My Mind's Eye 'Bright Dots' paper stack. and some orange and yellow flowers.

The base card is 6" x 6" and was a recent purchase from HERE. They supply excellent quality card stock (among other things) at VERY reasonable prices. Pop on over and take a look for yourself.

Hope Mo and her DT like it?

Thanks for visiting me today.
Hugs, Fae xxx

One for the Girls... and Boys

Hi girls... me again
These are two cards I have made using the same Mo Manning image 'Kai is One'. Although Mo has created two images, 'Kai Girl and Kai Boy' I bought Kai boy as I thought I would get away with colouring the same image in blue as well as pink. Anyway, I'll let you be the judge on that one. Here are the cards I created using the one image:


I coloured them both using my ProMarker pens.  The pink card is a 5" by 5" and the blue card is a C5 gatefold card.


What do you think? Do you think the same image works for both genders? I think so? And I am really pleased with how both of these cards turned out.

Thanks for stopping by.
Hugs, Fae xxx

Sunday, October 17, 2010

Experiment in Terror

Hi girls
Had a busy week, despite being full of flu. I have made a few cards that I would like to share with you and, a few that I won't, Mojo has been as poorly as my head I think and therefore SOME of the cards are fit for publication and the others... well... they're only fit for the bin!

Here's my first one, which was a bit of an experiment with terror. I enlarged the digi image to cover one half of the base card and then printed another of the same size onto plain white card. I then smudged some black stayzon ink around the edges of the base card and cut out a little piece of the duplicated image. Which I coloured in and mounted onto black mirri card. I coloured them in with ProMarkers; Cocoa, Henna, Cinnamon, Blush, Ivory, Lime Green, Indigo Blue, Cool Grey 5 and Cool Grey 3.

I was hoping for a totally spooky (yet cutesy) card and I think the black and white, with a splash of colour worked sort of... didn't it?

Thanks for stopping by.
Hugs, Fae xxx

Wednesday, October 06, 2010

Funky Chick

And my final card for today before I go to bed.

This was a lucky find.

I went onto google and typed in 'free children's colouring pages' as I was looking for an image (not used before) for a birthday card for a teenager, thinking Scooby Doo or Spongebob would come up. And I came across this free colouring image by Kenny K no less!!!! Fab!  So, I double checked that it was FREE and then proceeded to print it off and colour it in. I am sooooo pleased how it came out. So of course, I am giving all credit to the fabulous Kenny K for being such a fab artist and all the other credit goes to me. I am loving this card and this image. I think I did an 'okay' job on this one and Isabella loved it when she received it. Ahhhh, that's what making cards is all about... 'knowing that the recipient is chuffed that you spent so much time and effort into making a one-off special card just for her (or him).

Anyway, I hope you like the card and thanks for visiting my blog today.
Hope to see you all again soon.

Remember, the Hodge Podge Shop challenge begins tomorrow, so be sure to pop over and find out how to take part. Hope to see your fab creations.

Take care, my friends
Hugs, Fae xxx