Followers

Showing posts with label New Cards. Show all posts

Monday, January 23, 2012

Cards for Girls

I made these cards for two young girls birthdays.  A work colleague wanted something that wasn't too girlie but also wasn't too grown up. So I decided to make cards with their names which I sketched out roughly before committing to a solid outline (I wasn't happy with the 'Z') and then added the new Wryn digital images from Tiddly Inks. I just love these girls.

The whole new and very gorgeous collection of girls can be found here.

Christy croll is such a fabulous artist, enjoy looking around her shop, there's something for everyone. Not to mention tutorials and inspiration from the Gallery.

Hope you liked my cards and thanks again for stopping by.

Hugs xxx

Golden Couple

Here is my second Golden Anniversary card.

I made this card with one of Mo Mannings digital images and coloured it with my Promarkers and my Derwent pencils.

I coloured the image first then cut the image square. I had some yellow card off cuts and I ran one of them through the BigShot in a Cuttlebug embossing folder.

I then mounted all of the pieces onto the white card base and added some colour coordinated embellishments.

Hugs

Naughty... but Nice!

Well... a lot has happened since we last spoke.

I am on DAY 13 off not smoking and, since last Tuesday, I have lost 8lbs on the Slimming World diet, despite my eating like a horse! I'm loving it and feeling great.

A lot of people think I am slightly on the mad side dieting AND quitting smoking at the same time, but you know what... having given up smoking previously (in 2000 and putting on weight) I decided not to just quit this time but combine the two, and this time round... fingers crossed, it seems to be working so far. Big pat on the back for moi!

Anyway, back to my card. I was asked by a work colleague to make a Golden Wedding Anniversary card and I decided to make a 'straight' one and a 'humourous' one. The humourous one, which is in this post, I have decided to enter into the latest Passion 4 Promarkers blog challenge.

I used my promarker pens and my Derwent Watercolour pencils and a little Sansodor to blend. I then added some colour coordinated flowers, leaves, pins and ribbon.

Hope you like my card and thank you for stopping by. Watch out for my next post where you will find the 'straight' Golden Wedding Anniversary card. Enjoy x

Note added: January 24th. I got TOP 5 PASSIONISTA on the Passion 4 Promarkers Blog Challenge for entering this card. Yay


Saturday, January 07, 2012

Fairy Pia


Hello again

This card was made using one of Mo Mannings (www.mosdigitalpencil.com) images. She can be found here

I just love using digi stamps as they are so easy to edit and change the size to suit your card.  This card is 6x6 and I have made it into an easel card. You can see how the easel works in the second photograph, which shows the card open and 'standing'.

This card wasn't made to order, it's just another one for my 'box' at work. It's always handy to have a selection at work so that if someone wants a card as soon as possible, they can generally find something that is suitable AND it's still handmade, which makes it all the more special, plus it gives you the opportunity to get your name and your work noticed.

I do get quite a few orders from people who I don't know, but who have received one of my cards. It's always nice to get good feedback and especially nice when someone you don't know places an order for other cards.

Hope you like my card and thanks again, for stopping by.
Hugs

Breaking Dawn Card

Hi girls and fellow crafters

Here's a couple of cards I have made yesterday and today.

This first card I made for a work colleague whose daughter, Erin, turned thirteen yesterday.  She asked for a 'Breaking Dawn' card and I didn't want to make it too 'young' OR too 'old' and I thought this digi image from Tiddly Inks would be perfect.

The photograph doesn't actually do the card justice and looks so much better in the flesh (so to speak).

I coloured the image with my copics and my Derwent Watercolour Pencils and a little bit of Sansodor with a blending stump. I was really pleased with the overall colouring of the image and I mounted it onto coloured card, continuing with the breaking dawn theme, i.e. sunrise colours etc.

Here's an image of the blank digi and the finished coloured digi up close so that you can see all of the folds etc that I have added to her dress and his suit.  I actually wasn't that happy about how his suit turned out but I did like how her dress turned out.

Anyway, that's the first card to show to you all today, I hope you like it and thank you so much for stopping by. Hope you had a lovely 13th birthday Erin, all the best for a happy year to come.

Hugs and best wishes.

Thursday, December 29, 2011

Steampunk Girls II

Hello again,

This final card that I have made today is as the previous card, but in blue, and boy what a blue...

As before I cut out the topper card twice in two sizes. The first  I cut out in a really rich, vibrant blue and the second, slightly smaller piece I cut from white, with the printed image already on it.

I then added the colour to the edges using Impress 'Cerulean Blue' and a make up sponge.

Next, I coloured the image the same way as I did with the 'red' card and added another piece of the blue card to the base of the easel and then added a greeting and some ribbon. The edge was created with the Martha Stewart punch again (as before). I also added some pins.


Here's a close up version of the card closed and the smaller photo is of the easel standing up.

Thanks for stopping by again

Hugs and kisses

Steampunk Girls I

Well, I'm back again with the second of my cards that I have made today.  This card and the next are made using the same Digital Image from Tiddly Inks, but both cards are in different colours. One red and one blue.

I love these steampunk images. They look so fabulous and once again I have added the pleats and folds with my promarker pens and Derwent pencils, blended together with Sansodor.

I used my lovely die cutters again to cut out the topper card and printed the image onto one of them in whte and then added the Strawberry Fool with my make up sponge to the edges, as before.

I then added some Card Candi from Craftwork Cards in a graphite grey and made the backtopper in Graphite Grey aswell.

I then added another bit of the same card to the base of the easel and edged it with a Martha Stewart punch and added some ribbon.  I then added another greeting from Craftwork Cards so that the easel can stand up when opened.

Here is a photograph of the card when it is flat(ish) and I think it looks really effective especially against the scalloped base card.

And finally, here is a close up of the image so that you can see the detail more clearly.


The next card is almost identical but using the colour blue.

Thanks for stopping by and visiting, hope you like the card.

Hugs and kisses

Winter Fairy Talva

Hello fellow crafters and creative geniuses...

Well, hopefully as you can see, Santa bought my creative mojo back and I have made not one, or two... but THREE cards this morning, which I am really pleased with as they all turned out exactly as I pictured them in my head.

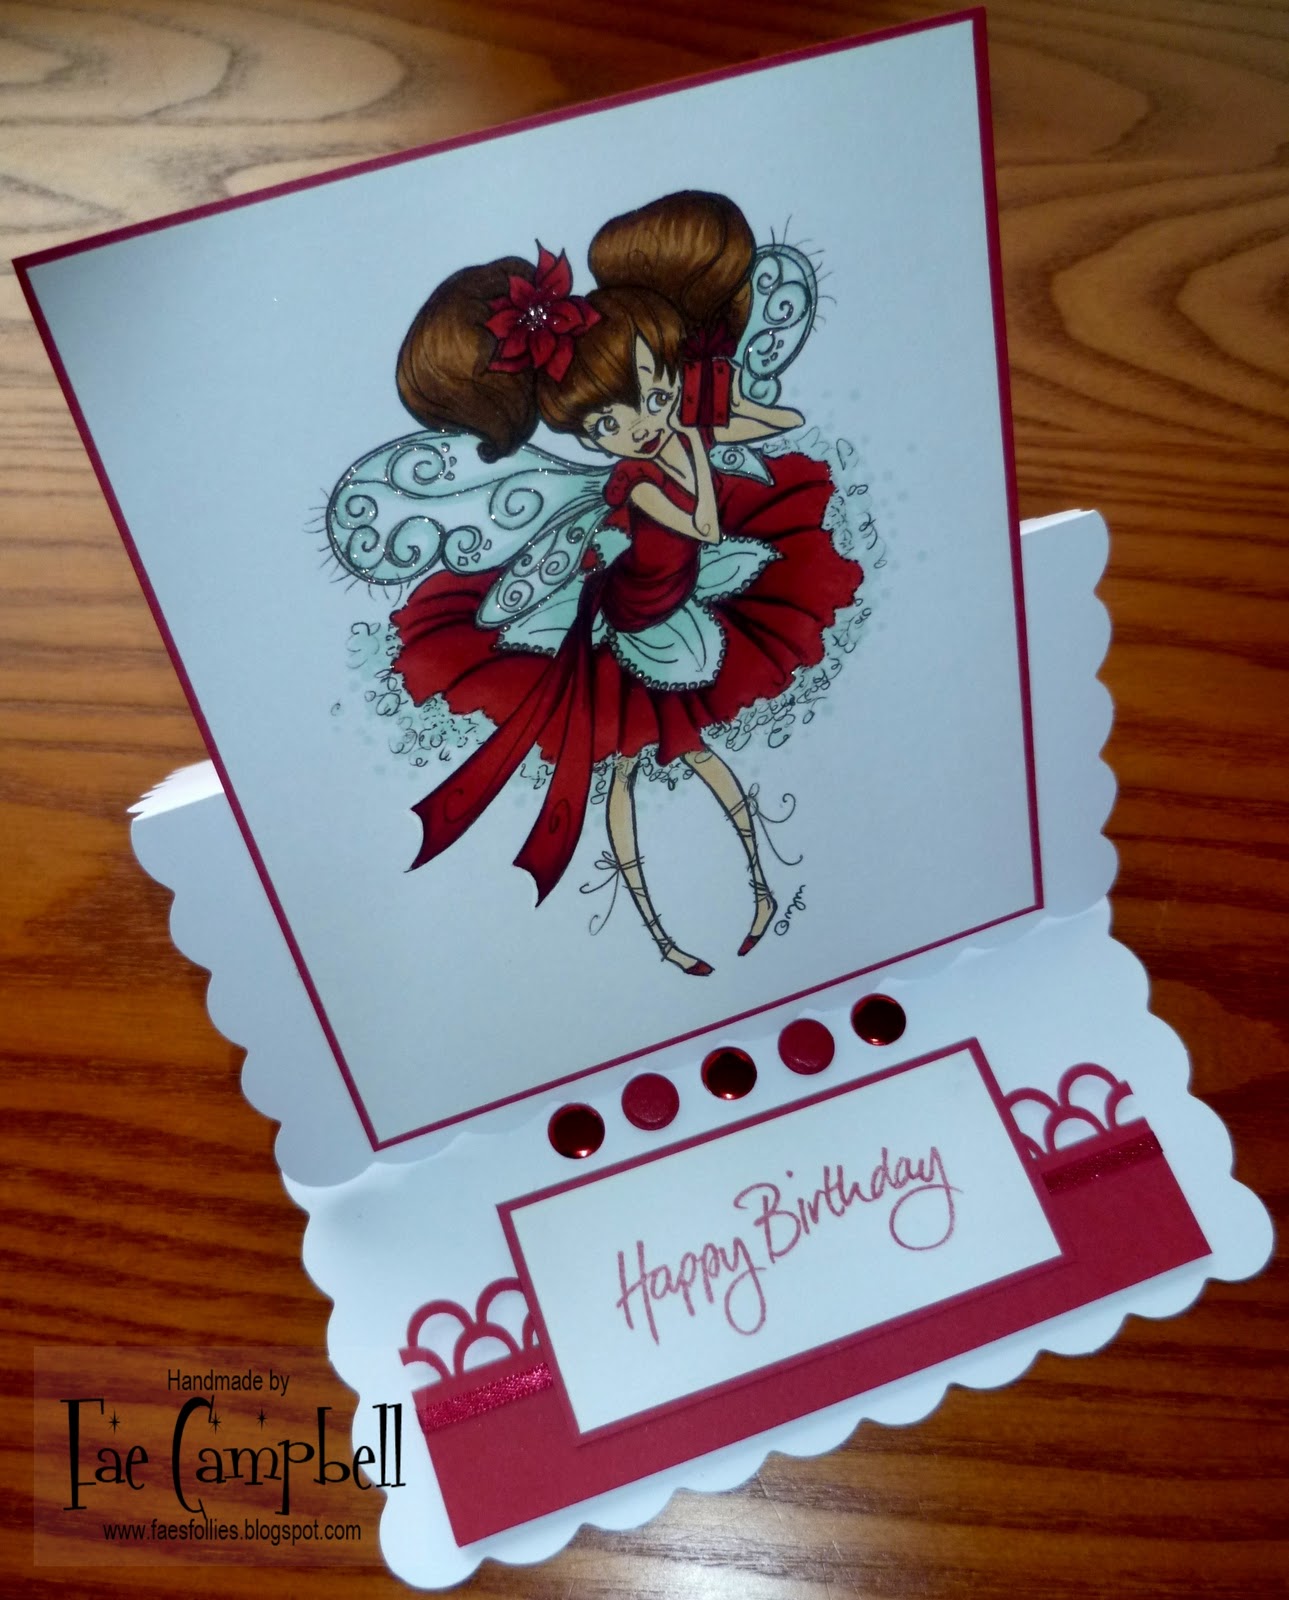
The first is using a new digi stamp from the ever talented Mo Manning over at Digital Pencil Too. Those of you who know me, know that apart from Vampires and all things super natural / paranormal, I absolutely love Fairies, hence my name. So here is a card I have made using one of Mo's winter fairies.

I decided to make the card an easel card and used my scalloped edged card bases from Craftwork Cards to produce it.  I used my large die cuts to create the topper cardstock and then cut out the image using one of the smaller ones. After cutting the image I kept it in the frame and then inked the edges using a make up sponge and some ink from one of my pads (Strawberry Fool from www.elzybells.co.uk)

I coloured the image using my promarker pens and added a little glitter to her wings.

I then added some gems to stand the easel up and a greeting and some ribbon. I  decided to make the greeting the same colour as her wings as I think there might have been a little too much red on it otherwise and I think the blue breaks it up just right.

I think I might get quite a bit of use out of this stamp as not only is it good for Christmas but I can also get away with using it for winter birthdays etc.

Anyway, I hope you like it and to finish the whole thing off, I have added a photograph of the whole card closed, so that you can see more detail rather than just the open card. If you click on the image it should bring it up even larger for you so that you can see how I have created the folds and pleats in her skirt, using not only my promarkers but also by using my Derwent pencils to create shadow and light. Hopefully I did it correctly, I found this brilliant tutorial on You Tube. If I can find it again, I will post it here so that you can see what I followed. Although I know most of you out there are already very capable of producing brilliant cards, some might find the video useful.

Hope you like it and thanks for stopping by today.

Hugs and kisses.

Monday, January 17, 2011

You got knocked up!!!

Hello fellow crafters
S'me again...

This time I was asked to make a card for a friend of a colleague from work, Anita. Her friend Claire has just found out she is having a baby so Anita wanted me to make her a card, and the inside wording says "You got knocked up... NO Tequila for a YEAR!!!"

Anyway, she told me what she wanted and I put my interpretation on it. I will give it to her at work tomorrow, so I hope she likes it?

Thanks for taking the time to visit.
Hugs, Fae xxx

Wednesday, May 28, 2008

Monochrome Waterfall

Well, here is the Monochrome Waterfall Card,
Bank Holiday Challenge, Sarn gave me.

I made this card using only black and white cardstock. I cut the white base card and then stamped it with my favourite leaf stamp from PSX (it doesn't have a name, just F-2781). I then cut the black cardstock as instructed on Splitcoast Stampers website and made the waterfall base. I then stamped four squares of white cardstock using the same 'Sketched Butterfly' from Stampendous! on each of them. I punched a hole and threadded through the thin black ribbon for the pull string. To finish the monochrome effect but not to leave it looking too stark, I added glitter just on the Butterflys body on each of the stamped images before attaching each piece to the sections on the waterfall base. Then I added the whole thing to the previously stamped white cardstock. Et voila! Next challenge please Sarn xxx

Monday, May 26, 2008

Flower Girl

This card was made with Bella as the star attraction with some shoe embellishments that I recycled from one of my recent birthday cards, which I thought went perfectly with the colours and the design of the card. The background paper (from www.urbanlilly.com.au) was mounted onto white cardstock and a ribbon was added to finish. Coloured in watercolours and blendable pencils.

A Time for Music

Another fab Penny Black image, sent to me courtesy of step-mummy Julie. Added some of my fab red flowered background paper on red cardstock and overlapped with the main image. Mounted onto smoked grey and red metallic cardstock. Simply coloured with blendable pencils and added a green watercolour background at the base of the cello.

One for the Boys...

Another 18th birthday card for another lucky lad. Hope he likes it??? I really like this stamped image (again courtesy of a friend who stamped a selection for me because I couldn't make up my mind which ones to buy - I'm definitely buying this one, hopefully when I visit the Glitter Pot in June).

I just love him all done up in his leather and jeans, a definitely Jimmy Dean card (and who doesn't love James Dean???)

One Martini...

Another favourite card. I love this stripy background paper and can't believe I have used it all up already, but I have to say that I have made some nice cards and have been really creative with it, it's been great matching colours with it. As you can see in this card, I have colour coordinated the background cardstock and her top with the paper and the flowers. Sarn sent me the image of the cupcake at the bottom, already stamped onto lilac card, which matched perfectly fortunately. So I added some glitter and some white highlights and coloured the cherry in red and green. I then mounted it onto foam pads to add some depth.

Acetate Inspiration

Using some inspiration from Katharina's blog, I decided to try and make an acetate card. Her card is far more superior than mine as she used some gorgeous rub-ons on her acetate but as this was a first attempt I don't think I did too bad.

I love this image too, which I coloured with blendable colour pencils and added to a red cardstock and yellow shimmer background paper. I didn't have a fab corner cutter so I simply used a small circle punch and lined it up to try and get equal sized corners...

Added the flower and a brad for each corner.

Tea Bag Challenge

I'm not very good with Tea Bag folding, but I got some freebies with a magazine and thought I would give it a go. This was the end result. I thought it might be a bit OTT but everyone in the house seems to think it's okay for someone who might appreciate the hard work that's been put into creating it. Although in truth, there really wasn't much to it apart from the endless folding!!! I added some adhesive flowers and butterflies that I received for my birthday and finished it off with some lovely background paper and ribbon. It's growing on me....slowly!

Bloomin' Lovely

This is a really simple card but I love it no less. I just wanted to create something that was easy on the eye and could be used for any occassion. I recycled the border from one of my recent birthday cards together with the ribbon and then added the Penny Black image that Julie sent me, which I coloured with Sakura Jelly Roll pens and added some glitter. Four 'Zoomz', sorry Sarn, I know it's not three but I kept to the odd number rule by adding one Zoomz to the top of the image and three at the bottom.

Working Girl

This card was made for one of the teachers leaving the school this summer so I thought I would try to create her personality in the card. She is very bright and a really nice person so I tried to use bright colours and I liked the image of the girl at the desk (as she is a teacher). I coloured the image using watercolour pencils to match the background paper and then decoupaged her name in the same colours. Then added a bit of glitter to finish of the effect.

Weekend Challenge

This was an image given to me by my adopted step-mummy, Julie. She wanted to see what I could create with it so this was what I came up with. The photo is a bit dark but I think you can see where I was going with it. I coloured some of the image with a blue Sakura Jelly-Roll pen to add a bit of metallic sparkle and then used the blues in the background to create different layers. The adhesive silver wording is by Anita's and the flower is as before. Hope you like it Julie and it gives you a little inspiration for when you use your stamp. More challenges please, I really had fun making this.

Trapezee Mouse

This image was given to me by Sarn. I wanted to create something special with it so I made a tri-fold card using the template that I adopted at one of Stamping Caz's crafting classes. I added some coloured paper for the background and tried to coordinate the colours with the other background cardstock. Watercoloured the image, added some glitter and then the ribbon and the flower, finished off with a 'Zoomz' stone in the centre. Thanks Sarn xxx